Chocolate Marshmallow Rocky Road Fudge Delightful Treat

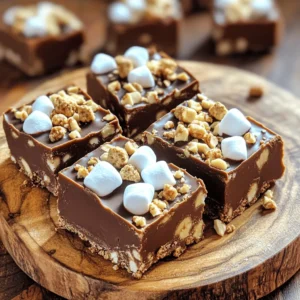
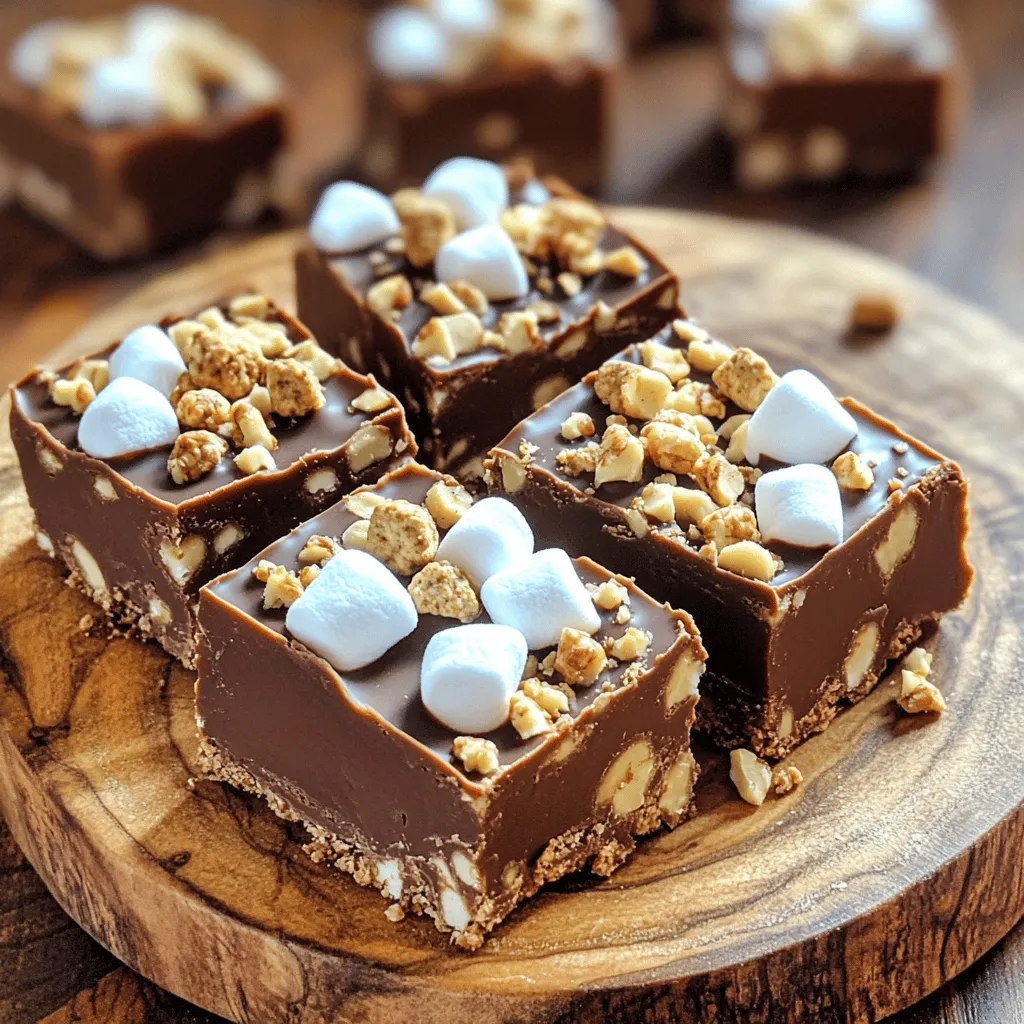
Looking for a sweet treat that combines gooey marshmallows, rich chocolate, and crunchy nuts? Chocolate Marshmallow Rocky Road Fudge is your answer! This delightful dessert is easy to make and perfect for sharing. With simple ingredients and straightforward instructions, you’ll impress your friends and family in no time. Let’s dive into this fun and tasty recipe that’s sure to satisfy your sweet tooth!

- 2 cups semi-sweet chocolate chips - 1 cup sweetened condensed milk - 1 cup mini marshmallows - 1 cup crushed graham crackers - 1/2 cup chopped walnuts (or any nuts of your choice) - 1 teaspoon vanilla extract - Pinch of salt - Use measuring cups and spoons for accuracy. Measuring correctly helps you achieve the best taste and texture. It ensures the fudge sets properly. Use a dry measuring cup for the chocolate chips and graham crackers. Use a liquid measuring cup for the sweetened condensed milk. For small amounts like vanilla and salt, use measuring spoons. This step makes a big difference in your final treat. Start by lining your 8-inch square baking dish with parchment paper. This helps make the fudge easy to remove later. Leave some paper hanging over the sides. This overhang works like a handle. It makes lifting the fudge out simple. Set the dish aside for now. Next, we need to melt the chocolate. Use a medium saucepan. Place the saucepan on low heat. Add the semi-sweet chocolate chips and sweetened condensed milk. Stir gently as it melts. This ensures a smooth and creamy texture. Be patient and keep stirring until it looks shiny and blended. Remove the saucepan from the heat. Now, let's add some flavor. Stir in the vanilla extract and a pinch of salt. Mix well to combine the flavors. After that, fold in the mini marshmallows, crushed graham crackers, and chopped walnuts. Make sure everything is evenly mixed throughout the fudge. Each bite should be full of different tastes and textures. Pour the fudge mixture into your prepared baking dish. Use a spatula to spread it evenly. Smooth the top so it looks nice. Now, place the dish in the refrigerator. Let it chill for about two hours. This cooling time helps the fudge firm up. You want it to be set but still soft enough to cut. Once the fudge is set, lift it out using the parchment paper. Place it on a cutting board. Cut it into squares. For a fun touch, arrange the squares on a platter. Top them with extra mini marshmallows and a sprinkle of crushed graham crackers. This makes for a beautiful and tasty presentation. Enjoy your delicious treat! To make great fudge, avoid common mistakes. First, do not rush melting the chocolate. Use low heat and stir slowly for a smooth mix. If you burn the chocolate, it will seize. This ruins the creamy texture. Next, be careful not to overmix when adding the marshmallows and nuts. Gently fold them in to keep their shape. Lastly, remember to chill the fudge long enough. If it’s too soft, cutting will be messy. You can make this fudge even better with fun twists. Try adding a pinch of sea salt on top for a sweet-salty combo. You can also swap the walnuts for pecans or almonds based on your taste. For a fruity touch, add dried cherries or cranberries. Feeling adventurous? Use dark chocolate chips instead of semi-sweet. This adds a rich flavor that balances well with the sweetness of the marshmallows. How you display your fudge can make it look extra special. Cut the fudge into neat squares and place them on a cute platter. For a festive touch, top each square with extra mini marshmallows and a sprinkle of crushed graham crackers. You can also arrange the fudge in layers, using colorful candy or fruits between each layer. This makes it eye-catching and fun! {{image_2}} If you have nut allergies, you can still enjoy this fudge. Simply skip the walnuts or any nuts. The fudge will be just as tasty. You can replace nuts with extra graham crackers or even some crispy rice cereal. This keeps the crunch while being safe for everyone. For a gluten-free version, use gluten-free graham crackers. Look for brands that are labeled gluten-free. This small change lets you enjoy the same great taste without gluten. You can also use crushed gluten-free cookies for a fun twist. Want to mix things up? You can try using dark chocolate instead of semi-sweet chocolate. This gives the fudge a richer taste. Adding a sprinkle of sea salt on top can bring out the flavors even more. You might also add toppings like crushed candy bars or sprinkles. Each twist makes your fudge unique and fun! To keep your Chocolate Marshmallow Rocky Road Fudge fresh, follow these steps: - Cool Completely: Let the fudge cool in the pan before storing. - Use Airtight Containers: Place pieces in a clean, airtight container. - Layer with Parchment: Use parchment paper between layers to prevent sticking. - Store in a Cool Place: Keep it in a cool, dry spot away from heat. These steps help maintain the fudge’s texture and taste. You want it to stay soft and chewy for as long as possible. If you want to freeze your fudge, here’s how to do it: 1. Cut into Squares: Slice the fudge into squares for easy thawing. 2. Wrap Individually: Wrap each square in plastic wrap tightly. 3. Place in a Freezer Bag: Put all wrapped squares in a freezer bag. 4. Label and Date: Write the date on the bag for reference. 5. Freeze: Store in the freezer for up to three months. To thaw, just take out a square and let it sit at room temperature for about 30 minutes. Your fudge can last a while if stored right: - At Room Temperature: It lasts for about a week. - In the Fridge: It stays fresh for two to three weeks. - In the Freezer: It can last up to three months. Always check for any signs of spoilage before enjoying your fudge. Proper storage makes all the difference in keeping it tasty! Yes, you can use different chocolates. Dark chocolate adds a rich taste. Milk chocolate makes it sweeter. White chocolate gives a creamy texture. Just keep the same amount. You might need to adjust the sweetness based on your choice. You can use coconut cream as a creamy base. Blend it with chocolate until smooth. Another option is using nut butter, like almond or peanut butter. This gives a nice flavor and creaminess. Just ensure you mix well for a smooth fudge. To cut fudge neatly, chill it well. Use a sharp knife to slice. Wipe the knife with a damp cloth after each cut. This helps keep the edges clean. You can also use a pizza cutter for straight lines. Absolutely! You can mix in dried fruits like cherries or raisins. Add candy bits for extra sweetness. For a crunch, try adding pretzels or crispy rice. Just be sure to balance the flavors. Now you have all you need to make delicious fudge. You learned about important ingredients and their measurements. You saw simple steps to prepare, serve, and store your fudge. Remember, you can tweak the recipe with flavors and variations. Keep these tips in mind to deliver a treat everyone will love. Enjoy making and sharing your fudge creations! It's all about having fun and being creative in the kitchen.

Ingredients

Main Ingredients Needed

– 2 cups semi-sweet chocolate chips

– 1 cup sweetened condensed milk

– 1 cup mini marshmallows

Additional Ingredients

– 1 cup crushed graham crackers

– 1/2 cup chopped walnuts (or any nuts of your choice)

– 1 teaspoon vanilla extract

– Pinch of salt

Measurement Guide

– Use measuring cups and spoons for accuracy.

Measuring correctly helps you achieve the best taste and texture. It ensures the fudge sets properly. Use a dry measuring cup for the chocolate chips and graham crackers. Use a liquid measuring cup for the sweetened condensed milk. For small amounts like vanilla and salt, use measuring spoons. This step makes a big difference in your final treat.

Step-by-Step Instructions

Preparation of Baking Dish

Start by lining your 8-inch square baking dish with parchment paper. This helps make the fudge easy to remove later. Leave some paper hanging over the sides. This overhang works like a handle. It makes lifting the fudge out simple. Set the dish aside for now.

Melting the Chocolate

Next, we need to melt the chocolate. Use a medium saucepan. Place the saucepan on low heat. Add the semi-sweet chocolate chips and sweetened condensed milk. Stir gently as it melts. This ensures a smooth and creamy texture. Be patient and keep stirring until it looks shiny and blended. Remove the saucepan from the heat.

Combining Ingredients

Now, let’s add some flavor. Stir in the vanilla extract and a pinch of salt. Mix well to combine the flavors. After that, fold in the mini marshmallows, crushed graham crackers, and chopped walnuts. Make sure everything is evenly mixed throughout the fudge. Each bite should be full of different tastes and textures.

Setting the Fudge

Pour the fudge mixture into your prepared baking dish. Use a spatula to spread it evenly. Smooth the top so it looks nice. Now, place the dish in the refrigerator. Let it chill for about two hours. This cooling time helps the fudge firm up. You want it to be set but still soft enough to cut.

Serving Suggestions

Once the fudge is set, lift it out using the parchment paper. Place it on a cutting board. Cut it into squares. For a fun touch, arrange the squares on a platter. Top them with extra mini marshmallows and a sprinkle of crushed graham crackers. This makes for a beautiful and tasty presentation. Enjoy your delicious treat!

Tips & Tricks

Perfecting the Recipe

To make great fudge, avoid common mistakes. First, do not rush melting the chocolate. Use low heat and stir slowly for a smooth mix. If you burn the chocolate, it will seize. This ruins the creamy texture. Next, be careful not to overmix when adding the marshmallows and nuts. Gently fold them in to keep their shape. Lastly, remember to chill the fudge long enough. If it’s too soft, cutting will be messy.

Enhancing Flavors

You can make this fudge even better with fun twists. Try adding a pinch of sea salt on top for a sweet-salty combo. You can also swap the walnuts for pecans or almonds based on your taste. For a fruity touch, add dried cherries or cranberries. Feeling adventurous? Use dark chocolate chips instead of semi-sweet. This adds a rich flavor that balances well with the sweetness of the marshmallows.

Presentation Tips

How you display your fudge can make it look extra special. Cut the fudge into neat squares and place them on a cute platter. For a festive touch, top each square with extra mini marshmallows and a sprinkle of crushed graham crackers. You can also arrange the fudge in layers, using colorful candy or fruits between each layer. This makes it eye-catching and fun!

Variations

Nut-Free Versions

If you have nut allergies, you can still enjoy this fudge. Simply skip the walnuts or any nuts. The fudge will be just as tasty. You can replace nuts with extra graham crackers or even some crispy rice cereal. This keeps the crunch while being safe for everyone.

Gluten-Free Fudge

For a gluten-free version, use gluten-free graham crackers. Look for brands that are labeled gluten-free. This small change lets you enjoy the same great taste without gluten. You can also use crushed gluten-free cookies for a fun twist.

Flavor Twists

Want to mix things up? You can try using dark chocolate instead of semi-sweet chocolate. This gives the fudge a richer taste. Adding a sprinkle of sea salt on top can bring out the flavors even more. You might also add toppings like crushed candy bars or sprinkles. Each twist makes your fudge unique and fun!

Storage Info

Best Practices for Storing Fudge

To keep your Chocolate Marshmallow Rocky Road Fudge fresh, follow these steps:

Cool Completely: Let the fudge cool in the pan before storing.

Use Airtight Containers: Place pieces in a clean, airtight container.

Layer with Parchment: Use parchment paper between layers to prevent sticking.

Store in a Cool Place: Keep it in a cool, dry spot away from heat.

These steps help maintain the fudge’s texture and taste. You want it to stay soft and chewy for as long as possible.

Freezing Fudge

If you want to freeze your fudge, here’s how to do it:

1. Cut into Squares: Slice the fudge into squares for easy thawing.

2. Wrap Individually: Wrap each square in plastic wrap tightly.

3. Place in a Freezer Bag: Put all wrapped squares in a freezer bag.

4. Label and Date: Write the date on the bag for reference.

5. Freeze: Store in the freezer for up to three months.

To thaw, just take out a square and let it sit at room temperature for about 30 minutes.

Shelf Life

Your fudge can last a while if stored right:

At Room Temperature: It lasts for about a week.

In the Fridge: It stays fresh for two to three weeks.

In the Freezer: It can last up to three months.

Always check for any signs of spoilage before enjoying your fudge. Proper storage makes all the difference in keeping it tasty!

FAQs

Can I substitute other types of chocolate?

Yes, you can use different chocolates. Dark chocolate adds a rich taste. Milk chocolate makes it sweeter. White chocolate gives a creamy texture. Just keep the same amount. You might need to adjust the sweetness based on your choice.

How do I make fudge without condensed milk?

You can use coconut cream as a creamy base. Blend it with chocolate until smooth. Another option is using nut butter, like almond or peanut butter. This gives a nice flavor and creaminess. Just ensure you mix well for a smooth fudge.

What’s the best way to cut fudge?

To cut fudge neatly, chill it well. Use a sharp knife to slice. Wipe the knife with a damp cloth after each cut. This helps keep the edges clean. You can also use a pizza cutter for straight lines.

Can I add other ingredients?

Absolutely! You can mix in dried fruits like cherries or raisins. Add candy bits for extra sweetness. For a crunch, try adding pretzels or crispy rice. Just be sure to balance the flavors.

Now you have all you need to make delicious fudge. You learned about important ingredients and their measurements. You saw simple steps to prepare, serve, and store your fudge. Remember, you can tweak the recipe with flavors and variations. Keep these tips in mind to deliver a treat everyone will love. Enjoy making and sharing your fudge creations! It’s all about having fun and being creative in the kitchen.

- 2 cups semi-sweet chocolate chips - 1 cup sweetened condensed milk - 1 cup mini marshmallows - 1 cup crushed graham crackers - 1/2 cup chopped walnuts (or any nuts of your choice) - 1 teaspoon vanilla extract - Pinch of salt - Use measuring cups and spoons for accuracy. Measuring correctly helps you achieve the best taste and texture. It ensures the fudge sets properly. Use a dry measuring cup for the chocolate chips and graham crackers. Use a liquid measuring cup for the sweetened condensed milk. For small amounts like vanilla and salt, use measuring spoons. This step makes a big difference in your final treat. Start by lining your 8-inch square baking dish with parchment paper. This helps make the fudge easy to remove later. Leave some paper hanging over the sides. This overhang works like a handle. It makes lifting the fudge out simple. Set the dish aside for now. Next, we need to melt the chocolate. Use a medium saucepan. Place the saucepan on low heat. Add the semi-sweet chocolate chips and sweetened condensed milk. Stir gently as it melts. This ensures a smooth and creamy texture. Be patient and keep stirring until it looks shiny and blended. Remove the saucepan from the heat. Now, let's add some flavor. Stir in the vanilla extract and a pinch of salt. Mix well to combine the flavors. After that, fold in the mini marshmallows, crushed graham crackers, and chopped walnuts. Make sure everything is evenly mixed throughout the fudge. Each bite should be full of different tastes and textures. Pour the fudge mixture into your prepared baking dish. Use a spatula to spread it evenly. Smooth the top so it looks nice. Now, place the dish in the refrigerator. Let it chill for about two hours. This cooling time helps the fudge firm up. You want it to be set but still soft enough to cut. Once the fudge is set, lift it out using the parchment paper. Place it on a cutting board. Cut it into squares. For a fun touch, arrange the squares on a platter. Top them with extra mini marshmallows and a sprinkle of crushed graham crackers. This makes for a beautiful and tasty presentation. Enjoy your delicious treat! To make great fudge, avoid common mistakes. First, do not rush melting the chocolate. Use low heat and stir slowly for a smooth mix. If you burn the chocolate, it will seize. This ruins the creamy texture. Next, be careful not to overmix when adding the marshmallows and nuts. Gently fold them in to keep their shape. Lastly, remember to chill the fudge long enough. If it’s too soft, cutting will be messy. You can make this fudge even better with fun twists. Try adding a pinch of sea salt on top for a sweet-salty combo. You can also swap the walnuts for pecans or almonds based on your taste. For a fruity touch, add dried cherries or cranberries. Feeling adventurous? Use dark chocolate chips instead of semi-sweet. This adds a rich flavor that balances well with the sweetness of the marshmallows. How you display your fudge can make it look extra special. Cut the fudge into neat squares and place them on a cute platter. For a festive touch, top each square with extra mini marshmallows and a sprinkle of crushed graham crackers. You can also arrange the fudge in layers, using colorful candy or fruits between each layer. This makes it eye-catching and fun! {{image_2}} If you have nut allergies, you can still enjoy this fudge. Simply skip the walnuts or any nuts. The fudge will be just as tasty. You can replace nuts with extra graham crackers or even some crispy rice cereal. This keeps the crunch while being safe for everyone. For a gluten-free version, use gluten-free graham crackers. Look for brands that are labeled gluten-free. This small change lets you enjoy the same great taste without gluten. You can also use crushed gluten-free cookies for a fun twist. Want to mix things up? You can try using dark chocolate instead of semi-sweet chocolate. This gives the fudge a richer taste. Adding a sprinkle of sea salt on top can bring out the flavors even more. You might also add toppings like crushed candy bars or sprinkles. Each twist makes your fudge unique and fun! To keep your Chocolate Marshmallow Rocky Road Fudge fresh, follow these steps: - Cool Completely: Let the fudge cool in the pan before storing. - Use Airtight Containers: Place pieces in a clean, airtight container. - Layer with Parchment: Use parchment paper between layers to prevent sticking. - Store in a Cool Place: Keep it in a cool, dry spot away from heat. These steps help maintain the fudge’s texture and taste. You want it to stay soft and chewy for as long as possible. If you want to freeze your fudge, here’s how to do it: 1. Cut into Squares: Slice the fudge into squares for easy thawing. 2. Wrap Individually: Wrap each square in plastic wrap tightly. 3. Place in a Freezer Bag: Put all wrapped squares in a freezer bag. 4. Label and Date: Write the date on the bag for reference. 5. Freeze: Store in the freezer for up to three months. To thaw, just take out a square and let it sit at room temperature for about 30 minutes. Your fudge can last a while if stored right: - At Room Temperature: It lasts for about a week. - In the Fridge: It stays fresh for two to three weeks. - In the Freezer: It can last up to three months. Always check for any signs of spoilage before enjoying your fudge. Proper storage makes all the difference in keeping it tasty! Yes, you can use different chocolates. Dark chocolate adds a rich taste. Milk chocolate makes it sweeter. White chocolate gives a creamy texture. Just keep the same amount. You might need to adjust the sweetness based on your choice. You can use coconut cream as a creamy base. Blend it with chocolate until smooth. Another option is using nut butter, like almond or peanut butter. This gives a nice flavor and creaminess. Just ensure you mix well for a smooth fudge. To cut fudge neatly, chill it well. Use a sharp knife to slice. Wipe the knife with a damp cloth after each cut. This helps keep the edges clean. You can also use a pizza cutter for straight lines. Absolutely! You can mix in dried fruits like cherries or raisins. Add candy bits for extra sweetness. For a crunch, try adding pretzels or crispy rice. Just be sure to balance the flavors. Now you have all you need to make delicious fudge. You learned about important ingredients and their measurements. You saw simple steps to prepare, serve, and store your fudge. Remember, you can tweak the recipe with flavors and variations. Keep these tips in mind to deliver a treat everyone will love. Enjoy making and sharing your fudge creations! It's all about having fun and being creative in the kitchen.

Chocolate Marshmallow Rocky Road Fudge

Indulge in the irresistible taste of Chocolate Marshmallow Rocky Road Fudge with this simple recipe! Made with semi-sweet chocolate, mini marshmallows, and crushed graham crackers, it's the perfect treat for any occasion. In just 15 minutes of prep, you can whip up a batch that will delight friends and family. Click through to discover how to create this delicious fudge and impress everyone with your dessert skills!

Ingredients
  

2 cups semi-sweet chocolate chips

1 cup sweetened condensed milk

1 teaspoon vanilla extract

1 cup mini marshmallows

1 cup crushed graham crackers

1/2 cup chopped walnuts (or any nuts of your choice)

Pinch of salt

Instructions
 

Prepare Your Pan: Line an 8-inch square baking dish with parchment paper, allowing some overhang for easy removal later. Set aside.

    Melt the Chocolate: In a medium saucepan over low heat, combine the semi-sweet chocolate chips and sweetened condensed milk. Stir gently until completely melted and smooth.

      Add Flavor: Remove the saucepan from heat and stir in the vanilla extract and a pinch of salt. Mix well to combine.

        Incorporate the Additions: Fold in the mini marshmallows, crushed graham crackers, and chopped walnuts until evenly distributed throughout the fudge mixture.

          Transfer to Pan: Pour the fudge mixture into the prepared baking dish. Use a spatula to spread it evenly into the corners and smooth the top.

            Chill Until Set: Place the dish in the refrigerator and let the fudge set for about 2 hours or until firm.

              Cut and Serve: Once set, lift the fudge out of the pan using the parchment paper overhang. Cut into squares and serve.

                Prep Time: 15 minutes | Total Time: 2 hours 15 minutes | Servings: Approximately 16 squares.

                  - Presentation Tips: Arrange the fudge squares on a decorative platter and top with additional mini marshmallows and a sprinkle of crushed graham crackers for a festive touch.